Define permissions and activate access
This article explains how to manage access to a file or folder. Access is defined creating one or more permission rules for users, groups, or roles. Permissions become active when the asset is moved from the Personal Workspace to the Organization Workspace. This two-step process ensures that permissions are set before content is shared.
ℹ️ You can use Permission Sets to apply predefined access rules. Permission Sets, covered in a separate article, are useful when you want to manage access at scale.
Create a permission rule
Open Permissions
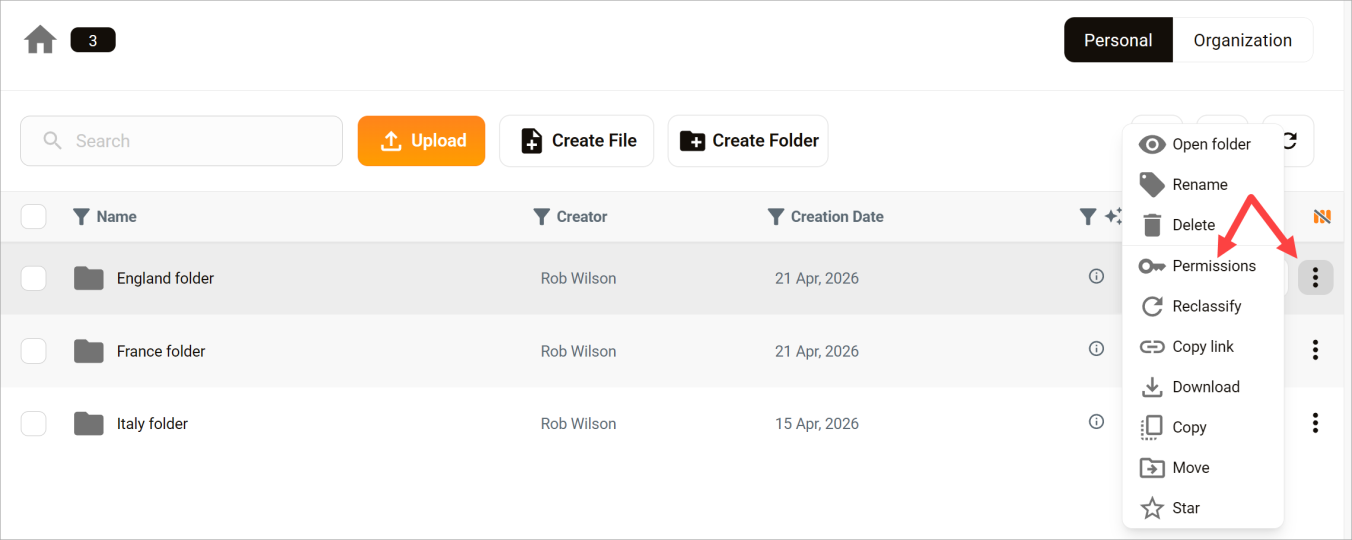
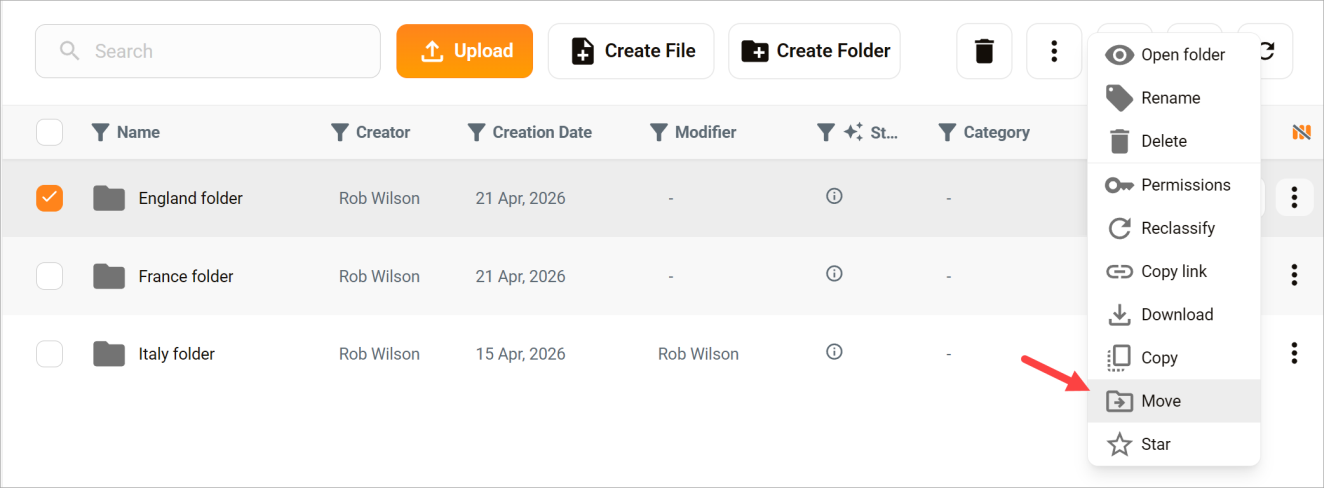
- Find the file or folder in your Personal Workspace.
- Open the three-dot menu on the row.
- Click Permissions.
Create a rule
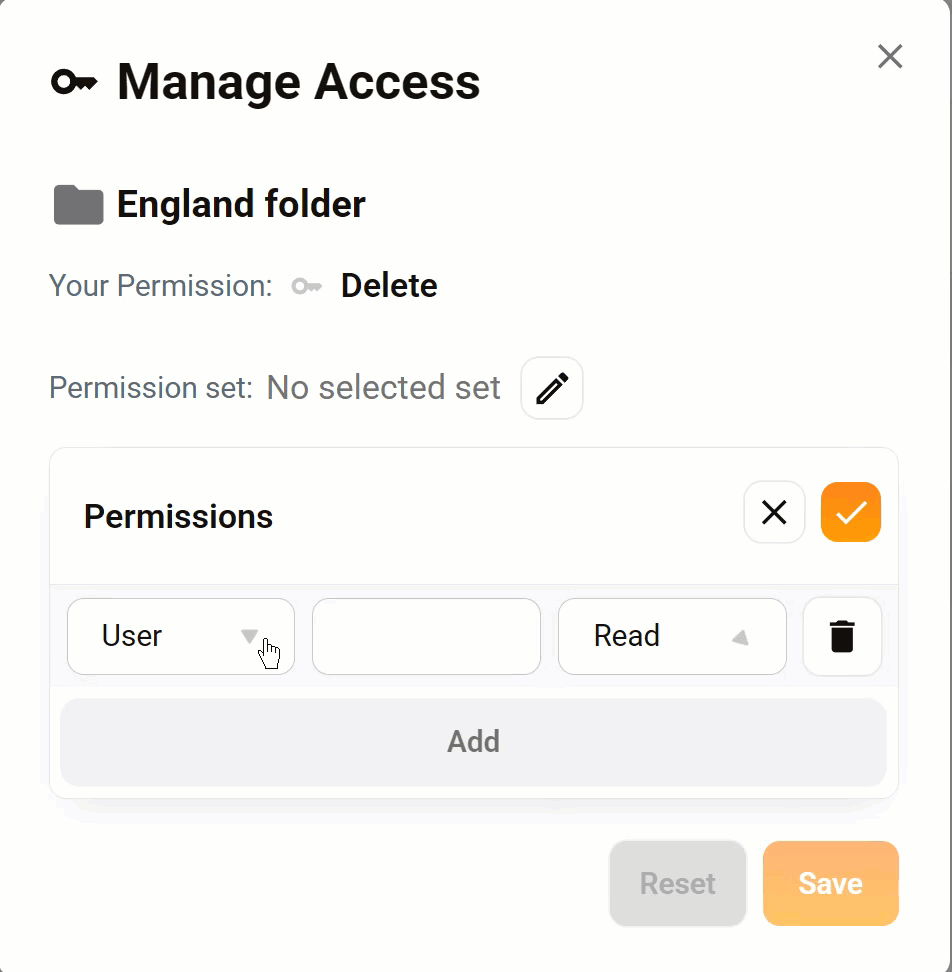
- Click the + button.
- Go to the first field on the left.
- Select an option: User, Group, or Role. The default setting is User.
- Go to the next field.
- Select a value.
- Go to the third field.
- Select Read, Write, Delete, or None.
- Click the check mark to confirm.
- Click Save.
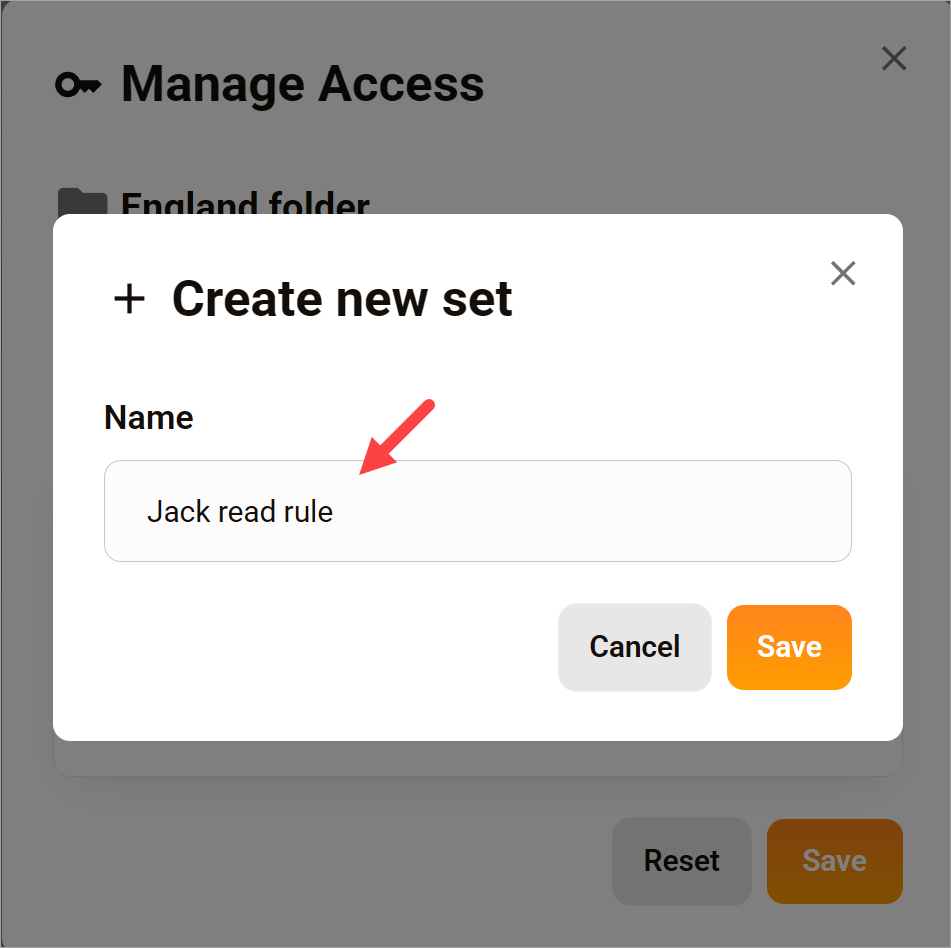
Next, give the rule a name and click Save. Once saved, you can apply the same rule to other files and folders by clicking the Permission set field.
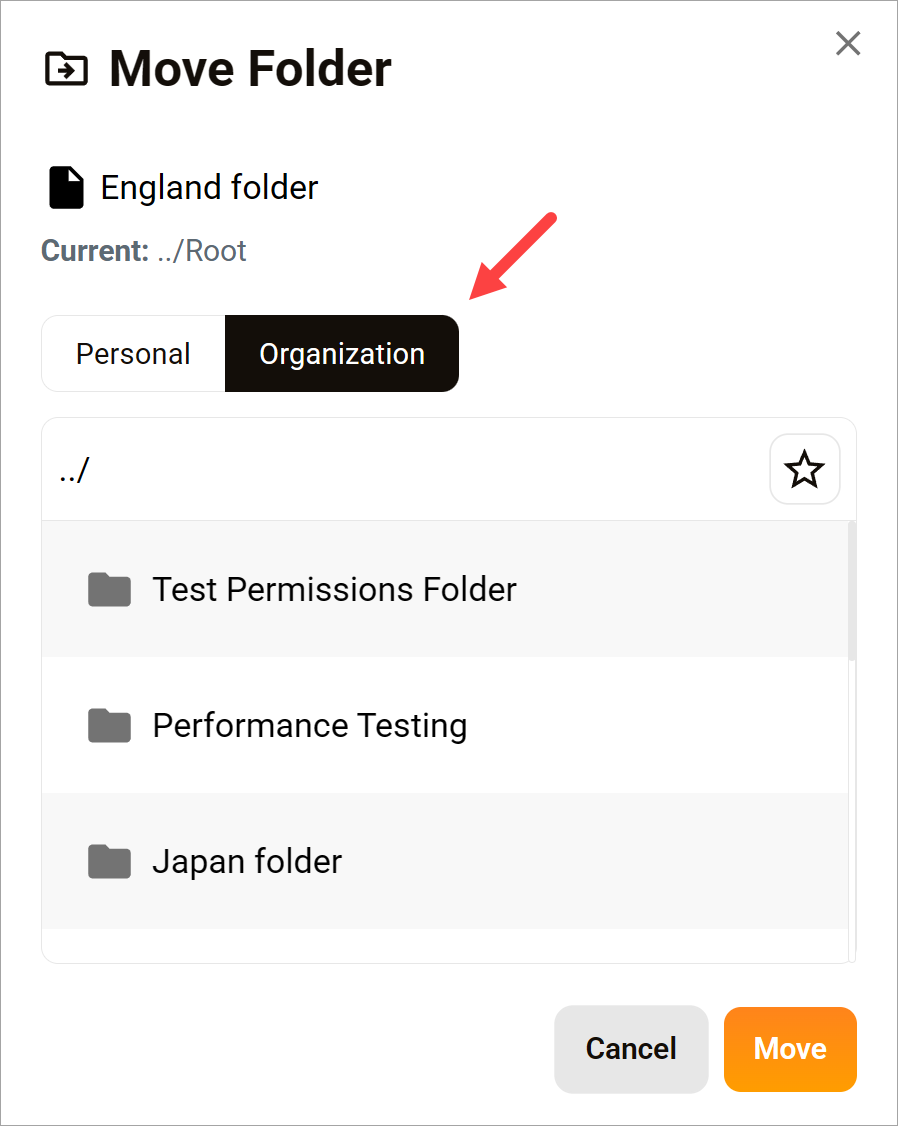
Move to the Organization Workspace
At this point, the rule is saved, but not active. The next is key: move the file or folder from your Personal Workspace to the Organization Workspace. Permission rules or sets only take effect when assets are in the Organization Workspace.
- Locate the asset row in the table.
- Click the three-dot icon.
- Click Move.
In the pop-up, select the Organization tab and click Move. Any user covered by this permission can now engage with the shared asset.