Use groups to assign permissions at scale
Admins use groups to assign a Permission Set to multiple users at once. This is the recommended way to control access to files and folders.
Groups help admins:
- Save time: assign permissions once, not per user.
- Stay consistent: Ensure users have the correct access.
- Scale easily: Manage access as the team evolves.
- Reduce errors: Avoid missed or incorrect permissions.
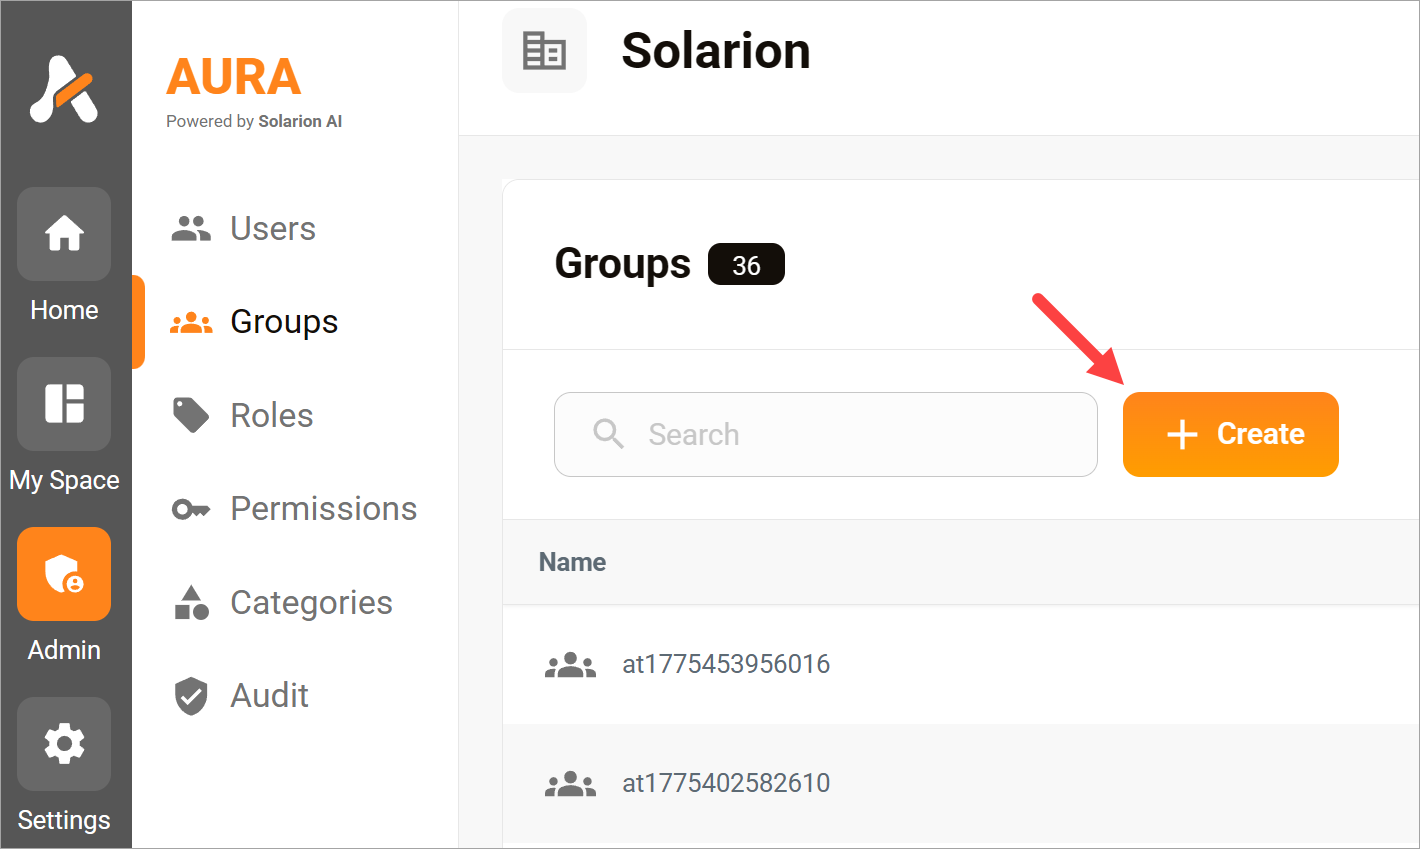
Create a group
- Click Admin in the side menu.
- Click Groups in the sub-menu.
- On the Groups page, click the Create button.
- Enter a unique group name.
- Click Create. The pop-up closes.
The group is ready for use.
Add users to a group
- Go to the Groups table.
- Locate a group name.
- Click the table row. A new page displays.
- Click the Add button. A pop-up displays.
- Search for a user by typing their name.
- Select the user from the suggestions.
- Click Add.
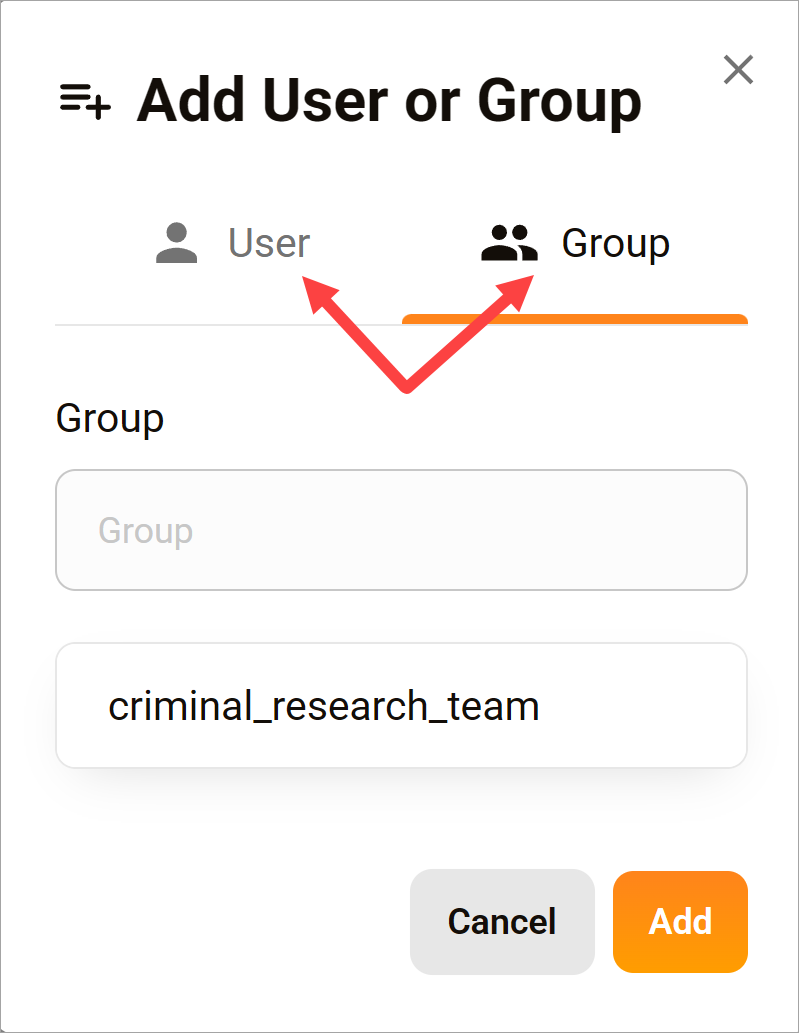
Add groups to a group (optional)
You can nest groups to simplify permission management.
- Open a group.
- Click Add.
- Search for and select a group.
- Click Add.
Members of the nested group inherit the parent group’s permissions.
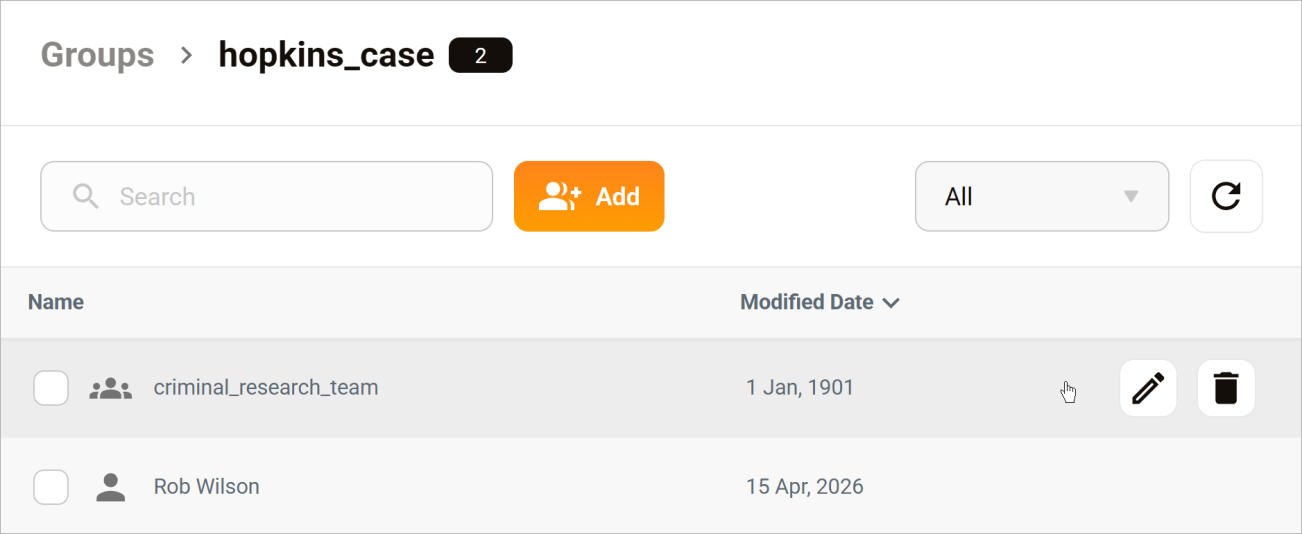
Editing a group
The group page displays all users and sub-groups assigned to the group.
- Click Add to include more users or groups.
- Hover over a row and click the delete (trash) icon to remove a user or sub-group.
Changes are saved automatically.
What happens when membership changes?
- Users added to a group automatically inherit its permissions
- Users removed from a group lose access granted by that group